Thursday, December 1, 2011

Solo Ciccia: meeting meat in Tuscany


Summer may seem far away, but thinking back to the month of August, I feel like I can head back to Tuscany in a minute.

Tuscany: a region of Italy that has long held the image of one of Europe's most romantic regions. Rolling hills and lush vines make up a beautiful scenery--and are the perfect setting for a terrible copilot like myself.

Oh no, I wouldn't even have the ambition to drive in Tuscany. No vintage Jaguar and scarf-wearing for me--I'd rather stick to gripping onto the map in the passenger seat of a Fiat 500.
Holding onto a map, mind you, is something quite different from helping out with directions. You'll easily understand how a bad copilot and tiny roads lost in the middle of vineyards could lead to major drama.

In our case, we just became a little more hungry with every wrong turn. And when hungry means hungry for meat, there's a place for that in Tuscany: Solo Ciccia.

Those who have read Anthony Bourdain's Heat are no stranger to the star butcher Dario Cecchini. In true Tuscan fashion, Cecchini masters the art of turning any cut of meat--or any part of the animal--into a delectable dish. On Sundays, Cecchini hosts lunches in true 'table d'hôte' style with a thematic you would easily get, even if it wasn't printed on the menu: La Vacca Entera, or the Whole Cow.

Now I'm most definitely the type to shy away--or squirm, or run away--from "strange" cuts of meat. Yes, dissecting a dead cow's internal organs in fun-filled, but eating them? Eh, not so much... until mid-August.

Notice the dessert offering; we weren't very hungry anymore by then (understandably), but since I don't need hunger to enjoy cake, I dove right in.
Olive oil, orange, and pine nuts: Tuscany in a mouthful. The crunch of a fine layer of sugar on top provides a welcome counterpoint to the moist texture of the cake.It's quick and easy to make, and as the weather becomes cooler, it serves as a nice reminder that Summer isn't ever that far away.


As close as I can try to come to the cake I had at Cecchini's, nothing beats having a bite above his shop before taking a walk in the village and heading back out on the road to get lost again, thanks to that terrible copilot I mentioned.

For a much-needed staycation, however, this cake is the way to go--a little Tuscan sun right in your kitchen.


Torta al'Olio
adapted from Italy Cooks by Judy Zeidler
makes 1 large cake

5 eggs
1 c. raw sugar
1/2 c. granulated sugar
2 oranges, finely chopped (whole!)
1/2 c. olive oil, plus 2 tablespoons for top
2 c. all-purpose flour
2 c. whole-wheat flour
2 TS baking powder
pinch salt
Raw sugar, to top cake
1/2 c. pine nuts, toasted

Preheat the oven to 180°C / 350°F.
Oil a springform cake pan and set aside.

In a medium bowl, mix flours, baking powder and salt and set aside.

Beat eggs and sugars with an electric mixer until the mixture forms "ribbons". Add oranges and mix.

Add olive oil, alternating with dry ingredients, and mix until smooth without overmixing.

Pour batter into prepared pan, sprinkle with sugar and pine nuts.
Bake approximately 30 to 40 minutes (depending on the size of your pan) until a knife inserted into the center comes out clean.

Cool on a rack before serving.


Tuesday, November 15, 2011

Back in the Game, Pumpkin-Style

Oh, hello!

It seems my blog and I weren't on writing terms for a little while. Not that I have anything against you, Bilingual Butter... I just had a little phase for a while.

I don't know quite how to describe it. You know how children go from loving pistachio ice cream to, all of a sudden, wanting nothing besides coffee gelato? Or how one day, that United Colors of Benetton Barbie just stops being the holy grail of all dolls, and the soccer Barbie (equipped with a leg that can score goals!) is everything you've been looking for?

Well, I've been having a case of the switchies of my own. Baking--as much as I love it--was slightly relegated to second place these past months, replaced by tasting of desserts not fabricated by myself and indulging in copious amounts of pastries. I'm not sure my stomach could handle any more baked goods, and so I gave in to the eating-without-baking-or-blogging-phenomenon. That, and frequent travels, from weekend trips to a week-long getaway to South Africa, made eating 24/7 an easy thing to do.


Today, however, it's cold outside. The sun is bright but low, typical of a crisp Fall afternoon. I think we all know--well, at least crazy baking obsessive types know--what that means. Can you hear that cranberry sauce singing in the background? This is the time of year baking at home comes back in full force. I'll never say no to a black sesame eclair from Sadaharu Aoki...but right now, I just want pumpkin pie. I want cinnamon, cloves, ginger. I want a bath of maple syrup and pecans...and then, another bath of water and soap, because I don't want to attract strange bugs (or strange people for that matter).
Although my blog posts may be rarer than they were in the past, Bilingual Butter and I have reconciled again. And boy do I have a lot to tell you...


Pumpkin Whoopie Pies
makes approximately 15 small pies

1 c. all-purpose flour
1 1/2 TS baking powder
1 TS ground cinnamon
1 TS pumpkin pie spice, or your own mix of ground ginger, cloves and (more) cinnamon
pinch salt

1/4 c. butter, softened
1/2 c. granulated sugar
1/2 c. raw cane sugar (you could use only granulated sugar as well)
1 large egg
1 TS vanilla extract
3/4 c. unsweetened pumpkin purée

Preheat oven to 185°C/350°F and line a baking sheet with a baking mat or parchment paper.

In a medium bowl, mix flour, baking powder, spices and salt together.

In a large bowl, beat butter and sugars until light and fluffy. Add egg and beat until incorporated. Add vanilla extract and pumpkin, and mix until combined. Slowly incorporate dry ingredients.

Scoop batter onto baking sheets by large tablespoon-fulls. Bake for approximately 10 minutes, until cakes spring back when touched. Remove from heat and cool completely on wire racks.

Meanwhile, prepare cream cheese filling:

4 oz. (around 120g) cream cheese, softened
2 TB (around 30g) butter, softened

Mix until fluffy. Add confectioner's sugar, 1/4 cup by 1/4 cup, until you reach the desired texture and taste (you should end up adding around 1 c.). Stir in vanilla extract to taste.

Once the cakes have cooled completely, spread a large spoonful of the filling on one side of half of the cakes and sandwich them. If not serving immediately, wrap them in plastic and refrigerate--the flavors will meld even better!

Friday, September 2, 2011

Summer Cake


Summertime baking probably evokes a range of memories for most of you. Something along the lines of staying away from the oven in 40 degree weather (Celsius, clearly, not Fahrenheit) and opting for fresh berries and whipped cream, or icebox cakes.

I, on the other hand, would rather stick my head in the oven during the Summer just to pretend it actually gets warm in Paris. You know, just crank it up to a nice warm and fuzzy temperature, grab a mojito, and delight in the fact that I can wear a tank top and skirt without regretting it later on when I start sneezing all over the place.

As you can see, summertime baking probably isn't the same for you and me. In my case, it's all about pretending that it's warm, so we should be indulging in some super-light desserts because you just can't eat a layer cake in this heat. But deep down, I really do need to turn that oven on, just to feel a little better. Enter the benefits of imagination, which allow you to look at the ingredients at your disposal and conjure up a recipe that's perfect for fake Summer weather.


You wanted healthy, well, here's a healthy dose of it. Not so healthy that you'll be left unsatisfied, however: this is an easy cake that blends fruit, whole wheat flour, but doesn't forget that sugar makes the heart grow fonder. (I think I may have gotten that one wrong--but can't you always replace words like 'absence' with 'sugar'?) It just might be enough to make you forget about the sad weather and pretend like you're actually alright with this whole wearing-a-sweater deal.

Nectarine Buttermilk Cake
serves 8

1 1/4 c. whole-wheat flour
1/2 TB baking powder
1/4 c. sugar
pinch salt
pinch mahaleb powder (from a cherry tree, the powder itself has a bitter almond flavor)
1 egg
1 c. buttermilk
2 TB butter, melted and cooled
a few drops almond extract

1 thinly sliced nectarine
turbinado sugar (or other coarse sugar)
slivered almonds

Preheat oven to 400°F / 200°C.

In a medium bowl, mix all dry ingredients together. Set aside.

In a large bowl, beat egg, buttermilk, butter and almond extract. Gently incorporate dry ingredients until combined. Pour into a medium cake pan or pie plate.

Add nectarine on top as well as sugar and slivered almonds.

Bake approximately 25 minutes until golden. Cool completely before slicing.

Wednesday, August 24, 2011

Page-Turners


There are cookbooks, and there are cookbooks.

The first are fun to look at, with expert photography and recipes that seem impossible to recreate. In short, they're the perfect coffee table books for food lovers.
Cookbooks, on the other hand, have meaning. Whether you've only tried out one or a hundred recipes, you've created a special relationship with all those characters on paper.

The first time you open it, curiosity abounds. The choice of the first recipe to try can be difficult if you're prone to shouting in delight  that "everything LOOKS SO GOOD" and jumping around, clapping your hands. Are you looking at me? Alright, yes, I'll plead guilty. I tend to do that when I get excited. 

Once you've settled on a first recipe, you think it over. Buy the ingredients. Try to make it as much of a success as possible. You might end up with an awful excuse for a cake, or on the other hand something pretty exceptional for a first try--either way, it leaves an imprint. 


Here's where it gets fun. Have you ever seen a cookbook that would seem like the first type, only to reveal itself as a wonderful example of a cookbook you find pleasure in actually cooking from? It gets better: a cookbook with recipes that seem difficult but end up being crowd-pleasers? 

Not even kidding. 

Enter Sweet Marx, a treasure trove of 108 desserts from famed French chef Thierry Marx. Although he's known in France as one of the chefs to popularize molecular gastronomy, his selection of desserts come across as new takes on classics more than crazy concoctions--and that's a good thing. Each one of his desserts, beautifully styled by his partner in crime Mathilde de l'Ecotais, may seem tedious because it's an alliance of a number of elements. In truth, however, everything comes together pretty quickly and flows together. You might need some special equipment--like a Siphon at times--but even if you don't have it, you can just leave some things out and it won't ruin the recipe. It'll just become a slight variation, a personalized version of the dessert.

The recipe I chose was the Cap Citron, an insanely light and refreshing dessert that brings lemon and yogurt together for a perfect Summer treat. I did make a few changes, namely serving the cake with currant sorbet instead of the suggested lemon; the profusion of red currants in the garden in Saint Dié "are to blame", but I don't think anyone was complaining.


Give this recipe a try--and I'll let you know how the other 107 recipes go. And meanwhile, for all the boys out there, here's a tip: if you find a girl who loves to bake, I can assure you that getting her a nice cookbook is the way to go. Not only will it make her squeal with delight and think you're pretty awesome, but most importantly, you've got a potential 108 desserts that she'll want to try out just for you. Doesn't that beat going to the bakery every day?


Cap Citron
adapted from Sweet Marx
serves 10

Note: I halved the recipe to make 5 individual desserts. Also, measurements are in grams--it pays to be precise in this case and using a kitchen scale is one of the keys to success.

Yogurt Cake
375g eggs
300g sugar
zest of 1 lemon
300g flour
40g baking powder
150g almond powder
250g whole-fat plain yogurt

Preheat oven to 180°C / 350°F.

Beat eggs, sugar, and lemon zest together in a mixer. Incorporate yogurt.
Sift flour, baking powder, and almond powder together. Pour over wet ingredients; mix until batter is homogeneous.

Pour into individual or one large baking frame and bake approximately 25 to 30 minutes. Let cool completely and slice cake to have a layer 0.5 cm thick (mince was a little thicker, which wasn't an issue).

Set aside.

Lemon Cream
250g eggs
150g sugar
140g fresh lemon juice
4 sheets gelatin (2g per sheet)
250g unsalted butter, softened
200g Italian meringue

Beat eggs and sugar together in a bowl.

In a heavy-bottomed saucepan, heat lemon juice, and add egg mixture. Bring to a boil and remove from heat. Add gelatin (if using sheets, soften them in cold water first).

Let cool to 40°C / 105°F in the fridge. At that point, add butter and Italian meringue with the help of a mixer. 

Pour onto yogurt cake, which should be back in the frame at this point.

Yogurt Cream
12g gelatin
600g whole-fat plain yogurt
130g heavy cream, very cold
150g Italian meringue

Heat gelatin and a few spoonfuls of yogurt together until tepid in the microwave. 

Whip heavy cream to stiff peaks. Mix remaining yogurt with the first yogurt mixture in a large bowl. Add Italian meringue and whipped cream.

Pour on top of lemon cream.

Refrigerate until serving. Remove frame and serve with sorbet and foam, if using.

Ginger & Star Anise Foam (I omitted the star anise here) - Optional
Note: You'll need a siphon for this part
80g egg whites
120g sparkling water
4g ginger
2 stars anise
60g lime juice
60g lemon juice
120g sugar
20g cane syrup
5g kappa carrageenan (gelling agent, I didn't have any and used agar-agar in its place)

Mix eggs whites and sparkling water.

Crush ginger and star anise in a mortar. Add lemon and lime juice, sugar, and cane syrup. Filter and add kappa.

Bring to a boil in a saucepan and pour over egg white/sparkling water mixture, stirring as you pour. Place in a siphon with two gas cartridges and keep at 50°C/120°F until use.

Lemon Sorbet - Optional
900g mineral water
250g sugar
150g tapioca maltodextrin
20g green tea leaves
200g lemon juice
40g glycerin

In a saucepan over medium heat, bring water, sugar, maltodextrin and green tea to a boil. Cover with plastic wrap and let infuse for 10 minutes.

Filter mixture over lemon juice and glycerin. Let sit and process in an ice cream maker.

Sunday, August 21, 2011

Summer Isn't Really Over, Right?

Have you chosen your new backpack yet? Filled it up with brand new notebooks--hey, they have sparkly pink ones this year!--and pens, not to mention awesome Hello Kitty name labels for each and every one of your precious belongings?

I think I forgot my Elmer's glue. Or maybe I got the wrong one.

Can I just pretend for another few minutes that I'm getting ready for school to start again? That might justify my buying a whole new wardrobe. You know how important that first day of school is, when you see your friends after a whole two and a half months and realize nobody has really changed all that much, except maybe that girl who kissed an actual boy at camp.

Alright. The truth is I've been at work, I'm no longer twelve years old, and I haven't been doing all that much baking. Mostly eating, to tell the truth, and I did manage to squeeze in a trip to Tuscany in there. Now that it's la rentrée, it's time to get down to business--so I'm back, and here is a tiny preview of things to come. See you soon!


Saturday, July 23, 2011

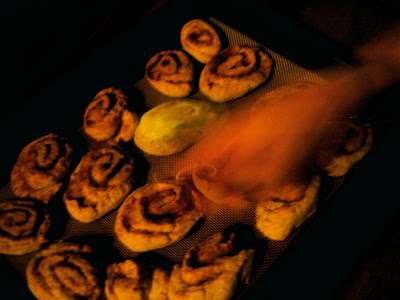
Cinnacookies

I have a list. It's hidden, deeply entrenched in my mind, but always reappears the second I step into the plane at Charles de Gaulle airport, headed to New York or Chicago. You guessed it: it's my "things to eat in the few days I have before I go back to France" list. Often, I'm disappointed, because something just doesn't exist anymore, or I don't have time for everything.
Somehow, though, I always manage to have a sugar cookie. Preferably from Schnucks grocery store in Urbana, Illinois, and preferably covered in multicolor sprinkles (they better be purple and pink). Sugar cookies are my weakness. As long as they're soft and vanilla-infused – yes, artificial vanilla, but still – I go crazy.


So… take a sugar cookie. Put it in your pocket, bring it to an airport in the US, and head to a Cinnabon store. Are you there yet? Buy a Cinnabon, take your sugar cookie out of your pocket, and look for a magician. Get the magician to transform your sugar cookie and Cinnabon into a Cinnacookie. A two in one, unbelievable, why-didn't-I-think-of-this concoction.

 They call it bake-in-the-dark.

Or, stay at home and bake these. Pretty much the same result, except you can eat ten of them at once without anyone looking at you with a weird stare. Even that family over there with the jumbo boxes from Popeye's, pretending like fried chicken is better for you than cinnamon rolls.
If you make these in the comfort of your own home (or someone else's home, but you get the point), you get a great bonus as well: the smell of sugar cookies and the aroma of warm cinnamon that permeates the air for hours to come.


All you might be missing now is a private jet outside your door, but trust me, you'll be so entranced by your cinnacookies that you would miss your plane anyway.

Cinnacookies
makes approximately fifteen

for the cookies:
1/3 c. granulated sugar
1/3 c. raw cane sugar
1/3 c. butter, softened
1 egg
1/2 TS vanilla extract
1/3 c. sour cream or crème fraîche
1 1/2 c. all-purpose flour
1/2 c. whole-wheat flour (or use only all-purpose if desired)
1 TS baking soda
1 TS baking powder
1/4 TS salt

for filling:
2 TB butter, softened
1/2 c. brown sugar
1 TB cinnamon

for the frosting:
4 oz. (approx 120g) cream cheese, softened
1/4 c. confectioner's sugar
1 TB milk

Preheat oven to 350°F / 180°C.

Cream butter and sugars until light and fluffy. Add egg, sour cream, and vanilla extract and mix until incorporated. Slowly stir in dry ingredients until you can make a ball with the cookie dough.

On a floured surface, pat dough down (or roll it out, in which case you may want to chill it a little beforehand) into a rectangle.

Spread softened butter on top and sprinkle with brown sugar and cinnamon. Roll dough up into a log and slice into 1/2-inch slices with a sharp knife.

Place on a baking mat or parchment paper and bake for 10 minutes. The cookies will not look done when you remove them from the oven--this is good!

Let cookies cool for five minutes while you prepare the frosting. Beat all ingredients together, and spoon over cookies.

Serve immediately or chill before serving, no longer than one day.

Thursday, July 7, 2011

The Whole Lemon (Tart)


How did your parents react when you used to start crying for a ridiculous reason?

In my case, if I started pouting about My Little Pony or crying when I really really shouldn't have, I often got the same response: "Would you like to bite into an onion to help you cry a little more?"

Barring the occasions when I would actually grab an onion and bite into it to prove that yes, thank you, I did need an onion and I feel much better now, it usually shut me up. The day I have children of my own, I'm thinking of reinventing the phrase…switching things around a little. Eating a raw onion isn't fun, but it sure is possible. Now eating a whole lemon…that's a pretty cool feat. Just imagine biting into the thick skin and tearing into the white pith. Delicious! Or just incredibly bitter. So bitter you just feel like spitting the whole thing out. I've never tried it—for once, I really haven't—but I can guess that unless you put a cup of granulated sugar in your mouth beforehand, it's probably not the most pleasant experience.

What happens when you take that same lemon, give it a whirl in a blender and mix it with other delicious ingredients (namely butter, sugar, eggs), and bake it?

Wait wait—could it even be possible that you would imagine spitting out a baked good? I can't recall the last time I did that. Well, maybe I can, and maybe it involved strange proportions of butter in a cake that ended up being a puddle of warm grease. That was a freak accident however, something akin to 30 foot waves, so you won't see me spitting out dessert anytime soon. And trust me—neither will you. Not with this tart, anyways.


If you're looking for a perfectly smooth, ultra shiny tart that dream storefronts are made of, head elsewhere (and leave more for me). The Whole Lemon Tart looks a little gritty, but like all things a little gritty, it packs some true flavor. Authentic tartness is what you're in for, rendered exquisitely palatable by a bit (quite a bit) of sugar. Perfect for summertime picnics, and especially perfect next time you're told to go eat a whole onion. Choose this instead, and act tough because you're eating a whole lemon.

Only crazy people do that.

Whole Lemon Tart
recipe adapted from Smitten Kitchen
serves 8

1 recipe tart dough (use your favorite)
1 medium-sized untreated lemon, rinse, seeded and cut into thin slices
1 1/4 c. raw cane sugar
scant 1/2 c. butter, cut into pieces
4 medium eggs
2 TB cornstarch
1/2 TS salt

Preheat oven to 350°F / 180°C. Butter a tart pan and press dough into pan. Partially bake with pie weights, approximately 15 minutes, until edges of dough start to become golden. Remove from oven and set aside.

In a food processor, mix lemon, sugar and butter and process until smooth. Add eggs, cornstarch and salt, and pulse until combined.

Pour into tart shell. Bake 35 to 40 minutes until center jiggles but looks like it's nearly set. The top of the tart should have a nice golden hue by now.

Remove from oven, let cool, and serve. Cover and refrigerate if not serving immediately.


Friday, July 1, 2011

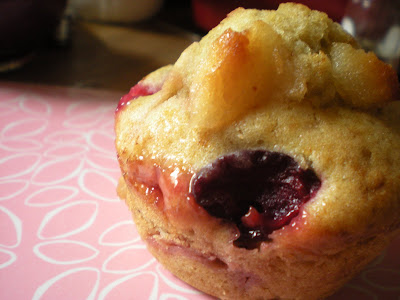
Cherry-Almond Muffins

I was ultra-tempted to entitle my post "Bluffin' with my muffin"...and then realized I really needed to drop the Lady Gaga references before you all start referring to me as a "little monster" and begin to think I buy Lady Gaga stickers to decorate my pink glitter notebooks. Because I don't actually have pink glitter notebooks...or rather, I don't actually have Gaga stickers. That's more accurate.


In any case, if you don't feel like kick-starting your day with a little Bad Romance or Edge of Glory, grab a muffin instead. Muffins seem to have this magical aura about them. Imagining a muffin for breakfast evokes images of happy flufiness, warm aromas, and a mug of tea. Lounging around and picking apart a huge, cloud-like muffin is a way to ensure a great morning, for a lot of people--French and American alike.

Plus, a muffin is like a blank canvas that a/ you can eat and that b/ tastes good. Meaning, you can add whatever you feel like having and it becomes a perfect expression of all your food fantasies of the moment. Simple blueberries? Go for it. Nobody will look down upon you if you opt for chocolate and peanut butter (hey, this is a muffin, so it's healthy...or not).

For a team breakfast at work, I went the seasonal route and put fresh cherries to good use in cherry-almond muffins...with a marzipan center. Healthy? Half. Good enough. And perfect for breakfast purposes.
Cherries on their own: delicious. Cherries + toasted slivered almonds? Getting even better. Cherries, toasted slivered almonds, and marzipan? That's what I'm talking about when I mean perfect for breakfast. Or a midnight snack, or whenever, really.


Cherry-Almond Muffins
makes 15

1/2 c. butter, softened
1/2 c. granulated sugar
1/4 c. raw cane sugar
2 eggs
1 1/2 c. all-purpose flour
1/2 c. whole-wheat flour
1/2 c. milk (I used skim)
2 TS baking powder
1/2 TS salt
2 c. cherries, pitted and cut in half
1/2 c. toasted slivered almonds
1 TS almond extract
1/4 log marzipan, optional

Preheat oven to 350°F / 180°C.

Cream butter and sugars until fluffy. Add eggs, one at a time.

In a medium bowl, mix dry ingredients together. Add to butter alternately with milk.

Stir in almond extract, cherries, and slivered almonds.

Spoon into greased or lined muffin cups. On top of each, add a small ball of marzipan (or a huge one, but you get to decide how much indulgence you're looking for!)

Bake for approximately 30 minutes, or until a knife inserted into the center of a muffin comes out clean. Cool on a rack.

Sunday, June 19, 2011

Mon Petit Chou, Rhubarb Edition


Americans have sweetie pie and honey. Italians have tesoro. The French have mon chou.

Chou, masculine noun: 1. cabbage 2. small, rounded, hollow pastry.

Chou is commonly employed to express the cute factor of something. "C'est chou" means that something is cute, "t'es chou" means that you're adorable, and so on. Couples refer to each other as mon chou. Yes, my cabbage. But more likely the cute, diminutive pastry that shines in its versatility.

Fill a bunch of choux (oh, the wonderful specificity of French spelling) with cream, make them into a pyramid using hardened caramel, and you've got a classic of French receptions, the pièce montée. Use your choux dough to make elongated pastries and you've got the éclair. Fill little choux with ice cream and top with hot chocolate sauce and here come the profiteroles. By means of a totally non-scientific demonstration, I have just proved that pâte à choux is basically everywhere and you can run but you can't hide. It'll get to you at some point.

A little chou is like the Beanie Baby of the pastry world (flashback to 1993!), except there's no risk of it being out of stock, so you won't have to go to all the Toys R Us of the country to find one. You can make a load of petits choux right here in your kitchen. 


Even better, be seasonal about it. Create a limited-edition chou! In this case, rhubarb and vanilla crème pâtissière come together for a fun time. You wouldn't necessarily think they would end up together, but some times these things happen and you don't see them coming. 

Slight bitterness of rhubarb + happy creaminess of vanilla pastry cream = a bite-sized dessert that's on just the right side of the sweet spectrum. 

You don't have to wait around for your chou to come into your life--you can just create it at home. Better than Edward Scissorhands.


Rhubarb Petits Choux
makes approximately 20 small choux

1/2 recipe pâte à choux (below)
1 recipe vanilla pastry cream (below)
1 c. cooked rhubarb, whirled in blender

Mix pastry cream and cooked rhubarb in a medium bowl. Place in a pastry bag fitted with a large round tip.

Pierce a small hole on the side of each chou and pipe filling inside. Refrigerate until a half hour before serving.

Eat the day of, or the next day at the latest.

Pâte à choux
120g (1 c. + 3 TB) all-purpose flour
10cl  (1/3 c. + 1.5 TB) whole milk
10cl water
10g (1 scant TB) granulated sugar
1 pinch salt
80g (5.5) butter
4 whole eggs

Bring milk + water to a boil in a saucepan.

Add butter and salt.

Sprinkle flour into saucepan, beating vigorously. On low heat, "dry" the dough out by beating it until it stops sticking to the pan. Remove from heat and add eggs one by one, mixing until well incorporated before adding the next one.


Vanilla Pastry Cream
15g (1 TB) cornstarch
40g (3 scant TB) granulated sugar
18cl (3/4 cups) whole milk
2 egg yolks
18g unsalted butter (1 1/4 TB), room temperature
1 vanilla pod, scraped (or use what you have left from the crust recipe)

Bring milk and vanilla to a boil in a medium saucepan, and remove from heat. Add cornstarch and half of the sugar.

In a small bowl, beat yolks and remaining sugar until lightened in color, about 3 minutes. Add a little of the milk beat to combine.

Place egg mixture in saucepan; beat regularly on medium-high heat. Bring to a boil and remove from heat.

Keep beating until pastry cream achieves a thick but silky consistency. When the cream reaches 50°C / 120°F , add butter and keep beating until incorporated.

Let cool.

Saturday, June 11, 2011

Cherry Cherry Boom Boom

Alright, yes, I am happy to admit that I enjoy listening to some Lady Gaga at times. But then again, don't we all? 

Wait, what? You don't? Oh ok. (I know you're just pretending, and you secretly want to learn the full choreography to Judas. But I won't tell anyone.) 

I may like Lady Gaga, but I'm pretty sure I was randomly referring to cherries in my sentences long before she was. 


When I was young, I would pretend like every other little girl that pairs of cherries were actually earrings, putting them around my ears and letting them dangle like I was the trendiest girl in town. I grew up a little, and put the cherries down. I couldn't seemingly live without cherries in my life, however, so I proceeded to wear shirts with cherries and draw cherries everywhere. If I had found a keychain with cherries on it, you can bet it would have been added to my collection. 

Don't even get me started on artificially-scented and flavored cherry items. Pencils, lip balms... you name it, I loved it.

Now that all I have left from that obsession is a "freshly picked cherries"-scented candle, and actual cherry season is in full swing here in France, I can get down to serious business. I.e., baking. With cherries. Namely, cherries from my uncle's garden in Saint Dié. 

Cherry clafoutis is a classic French dessert--for those unfamiliar with it, it's pretty much a baked custard, usually served family-style in a large dish. Cherries are the traditional fruit of choice for a clafoutis: the sweet tartness of the fruit is perfectly balanced by the creamy custard, making it a light and simple dessert for many occasions.


There are a lot of ways to prepare a clafoutis, the tastiest ones including the addition of cream. For the one I made last week, skim milk was what I used in an attempt to pretend like I'm "watching what I eat". "Attempt". Although skim milk isn't cream, surely, it makes for a darn good clafoutis. 
Another subject that truly divides the masses here in France is whether or not to pit the cherries. If you do, it'll make the clafoutis easier to eat, but you'll lose the juice. Unpitted cherries may be a hassle when you're chomping down on your share of dessert, but nothing beats a juicy cherry, so go for it. 

So good you'll feel like singing Pokerface with cherry earrings--and that's something to thank Gaga for, too.


Cherry Clafoutis
serves 6

1 lb. cherries, washed and stems removed
3 eggs
1/2 c. granulated sugar
1 1/4 c. all-purpose flour
pinch salt
1 1/4 c. milk

Place cherries in a bowl and mix in with half of the sugar. Let sit for at least 30 minutes.

Preheat oven to 350°F/180°C. Butter a round 10-inch pan or equivalent, or 6 individual dishes.

Beat eggs in a medium bowl and set aside. Sift flour and add sugar and salt. Incorporate eggs and mix. Add milk and mix until homogenous.

Place cherries in pan and pour custard on top. Bake for 35 to 40 minutes until golden. Cool in pan and place in refrigerator. Serve cool or cold.

Monday, June 6, 2011

Milk, Milk, and Milk: Tres Leches Cake

"Are you getting enough calcium?"

I hear that a lot.
Somehow, people around me seem to to worry that perhaps I'm not drinking enough milk or eating a sufficient amount of yogurt on a daily basis.

Let's get things straight: I drink nearly two liters of milk per week, and usually have at least one other dairy product each day. Happy?

Oh, and also: I've been making tres leches cake. I think I'm on the safe side, calcium-speaking. Sounds like I just heard someone add "on the saturated fat level, you're not so bad either" but pssh! Cows are my friends. My friends are not cows, however--that only works in one direction.


Tres leches cake has the most descriptive yet simple name you could possible think of. Three milks. Got it.

What the name fails to capture, however, is the sheer addictiveness of the cake both in taste and texture.
The process by which you achieve this incredible feat of putting three types of milk into one single cake makes it akin to a tea ceremony, crossed with a strange Halloween remake.

Carefully, you prepare each ingredient for the moment the cake is removed from the oven. Sweetened condensed milk, heavy cream, and normal milk (in this specific case) stand, aligned, ready for their sacrifice. The cake is greeted at the oven door by a knife, and at this point, it's time to give way to all your secret murder fantasies.

I personally stabbed my cake fifty times, and trust me, it felt really good.

After the cake gets drenched in milk and cream, let it sit in the fridge for a few hours if you can--that's the hard part. Once you suspect it just might be perfect, take a spoonful straight out of the pan. Don't bother with a plate.

The cake is dense yet melts in your mouth, leaving behind the sweet, creamy taste of condensed milk. It's more than that, though: vanilla mingles with a soft caramel, intensifying the impression that you've just landed on a pillow of perfect cake.

Please, help me get the word out to my entourage that calcium is back on the team: tres leches cake is becoming a regular around here.


Tres Leches Cake
serves 6 to 8


for milk mixture:
1/2 can (7 oz.) sweetened condensed milk
6 oz. whole milk
1/2 c. heavy cream
1 TS vanilla extract

for cake:
2 c. all-purpose flour
1 TS baking powder
1/2 TS salt
1/2 TS cinnamon
1/2 c. milk
1/4 c. (1/2 stick) unsalted butter
1 TS vanilla extract
2 eggs
3/4 c. sugar

Prepare milk mixture: Heat sweetened condensed milk in a double boiler over medium heat until slightly thickened. Whisk in milk, cream, and vanilla. Set aside to cool.

Prepare cake: Preheat oven to 350°F / 180°C. Grease and flour a 8x8 in. square baking pan, or any other pan of comparable size.

In a medium bowl, whisk flour, salt, baking powder, and cinnamon together. In a saucepan over low heat, mix butter, milk, and vanilla extract until combined.

In a large bowl, whip eggs on high speed and gradually add sugar, until thickened and whitened, about 5 minutes. On low speed, add butter mixture and whip until combined. Next, add flour mixture until incorporated and smooth.

Pour into prepared pan and bake approximately 30 minutes, until a knife inserted in the center of the cake comes out with a few crumbs attached. Let the cake cool in pan about ten minutes.

Poke around 30 holes in the cake using a knitting needle, skewer, or knife. Pour milk mixture over cake and let cake cool at room temperature. When cool, cover with plastic wrap and refrigerate until mixture is fully absorbed and cake is cold, at least two hours.

Serve, alone or with whipped cream. Or simply eat the whole thing straight out of the pan on your own (recommended).

Tuesday, May 31, 2011

When Lemon Met Almond


Here is one of the many reasons knives are one of the best things around:

With a knife, you can cut a cake open.

An open cake means a world of possibilities.

The equation is quite simple: take a cake you really enjoy. It's got the perfect flavor, you've got the recipe down, and just imagining it makes you happy. You know you've got that cake in your repertoire. Hey, even if you don't even step foot in a kitchen, you've got that cake somewhere in your taste memory.

Now, use the power of your mind (or simply get the cake and grab a knife). Imagine sawing off the top half of the cake. If you've arranged things right, the cake won't fall apart into a million pieces. If it does, rejoice: you've got a reason to eat all the crumbs up before anyone notices and you can bake a new cake. Hoorah! "Free cake!" I like that reasoning.

Now take a look at those cake halves, and open up the valve of ideas. What would you like to slather on today?


Some would say peanut butter. Others go for Nutella. The really cool people go for PB and Nutella. You've also got the ones who say they need a little fraîcheur, so fruit compote is the way to go.

What if you want it all? The fresh fruit and the richness? Look no further than lemon curd. Especially if the cake is a lemon-almond visitandine, I repeat: look no further than lemon curd.

This association is like Summer in a mouthful, if Summer were to decide she got a little tired of eating salad and drinking water all day long. This is the part when Summer gets fun.

When Lemon Met Almond
serves 8 to 10

1 visitandine (recipe here)
1/2 batch lemon curd (recipe follows)

Piece of cake: slice visitandine in half horizontally.

Spread lemon curd on bottom half, close up the cake by placing the top half back on.

Tah-dah!

Lemon Curd
makes 2 1/2 cups
4 egg yolks
2 whole eggs
3/4 c. sugar
2/3 c. fresh lemon juice
8g lemon zest (approx. 1 TB)
145g (10 TB) cold butter, cut into pieces

Rub zest and sugar together.

Mix lemon juice, sugar/zest, and eggs together in a heatproof bowl. Place it over a pan of simmering water.

Cook, whisking constantly, until a thermometer reads 75°C.

Remove from heat; when temperature comes back down to 60°C, incorporate butter and mix for 5 minutes.

Cover surface with plastic wrap and set aside to let cool.


Thursday, May 19, 2011

I scream for Ice Cream (Sandwiches)


Well hello, blog!

Times have been rough, and by rough I mean that I've been spending too much time basking in the last of the day's sunlight at cafés after work. Therefore, my baking has gone down exponentially and sadly, so has my blog updating. I have a list of things I really want to try just piling up, but right now I'm in a pancake mood and seem to be cooking up buttermilk pancakes by the millions. Not really. But you know.

Anyway, I was thrown back into food mode this morning and became a spastic little girl wearing yellow shoes, surrounded by men in suits walking to work with a sad look on their face.

Why's that?

Alright. I'll give in to being publicly happy about it. I got an article published in Fricote magazine! Well, that's not even the best part. Best of all is that the article is about ice cream sandwiches, with which I share a love story of epic proportions (like with most sweet things, granted, but still). The chocolate cookie sticking to your fingers, the half-melted vanilla ice cream... you got it. I would marry an ice cream sandwich if I could get a huge ice cream sandwich edible engagement ring. Uh oh, I hear someone saying that's not possible. I'll settle for someone who hides an engagement ring in an ice cream sandwich, then. (Guys like that do exist, right? Other than in movies? Maybe?)


Researching ice cream sandwiches has to be the best activity ever, and meeting everyone in the big ice cream sandwich community was even more fun. I'll get back to the geniuses over at Melt Bakery in my next post.

If you're anywhere near France right now, get your hands on Fricote. Issue #3 has a large section about street food, and other interesting interviews, articles, photos and drawings that will make you smile. And hungry.

Sunday, May 8, 2011

Lemon Ricotta Cheesecake


As you may have understood by now, I'm all about Easter chocolate.

However, like I tend to be sad when I see a stuffed animal on the ground, I also get kind of sad when I abandon all other types of dessert in favor of chocolate.


Seriously, how sad is this?

The only issue I have regarding desserts during the Easter season is that I already have a perpetual I-ate-too-much-chocolate stomach ache. Is there a dessert that could actually make you forget all that?

Are you thinking of a layered carrot cake with clouds of cream cheese frosting?

I'm not.

To counter all that sweetness in the chocolate, I actually think Easter might just be the time to break out that tangy, only slightly sweet dessert. Something fresh, bright, almost palate-cleansing (to get ready for the next round of chocolate, although I won't put it that way).

In comes lemon ricotta cheesecake.

Although real cream cheese has finally landed this side of the Ocean and the prospect of a "true" cheesecake is finally something we can bounce off the walls over, cheesecake sometimes proves to be a little heavy after all that Easter chocolate feasting.

Now ricotta cheesecake, on the other hand, is an altogether different story... For those of you used to putting ricotta in dishes involving tomatoes or eggplants only, read on!


Ricotta cheesecake is an interesting thing; it looks pretty dense when you glance at it. But when you have a bite, it's definitely not. Very creamy, sure, but also light and tangy. Adding a hint of cinnamon gives it a little depth, and the lemon makes it nearly refreshing.

The lovers of super-sweet desserts might not love this one as much, but if you're afraid of something like that, here's a solution. Add a layer of salted butter caramel. Yeah, you can thank me later.


Ricotta Cheesecake
serves 6 to 8

3 TB crushed cookies, like French petit beurre
2 lb. ricotta, room temperature
6 eggs, room temperature
2/3 c. sugar
1/4 c. all-purpose flour
2 TB grated lemon zest
juice of one medium lemon
1/2 TS salt
1 TS vanilla extract
1/2 TS cinnamon

Preheat oven to 350°F / 180°C, placing rack in the lower third of the oven.

Butter a springform pan and dust with cookie crumbs on the bottom and sides of the pan.

Mix all remaining ingredients together until batter is smooth. Pour into pan and bake 1 hour and 45 minutes, until cheesecake is golden but center is still wobbly.

Cool in pan and keep at room temperature until serving. 

Thursday, April 28, 2011

This is What Easter is For

This year for Easter, I got a chocolate egg as big as my head.

Not even kidding. I guess my parents heard the little voice inside me thinking "man, I wish I were still eight and could legitimately get a huge, chocolate-filled chocolate egg for Easter". Honestly, I would have been happy with a small inch-long egg.

So imagine my joy when I realized I had a chocolate egg all to myself, that I could fit my skull in if I felt like it. (In that case, though, I wouldn't be able to enjoy the chocolates so it would be a little counter-productive.) Lo and behold, the egg was filled with chocolate--all kinds of it. Chocolate covered hazelnuts, chocolate fish, praliné chocolate...everything, I tell you.


Here's where it gets interesting. After opening the egg, I had one, maybe two chocolates. I closed the egg back up, wrapping it in its pretty purple ribbon (did I ever mention purple is my favorite color? A sign, I tell you). I even placed it delicately back into its box, where the egg is held beautifully upright. That was after dinner, around ten.

The next day, I had my timing all set out. I would have one or two chocolates after each meal and that would be that. I was planning on having my head-sized egg last quite a while. I then came up with an idea.

I was going to stick to my promise that I would only have chocolate after a meal. Oh but wait. Technically, having a small chocolate is a meal in itself. So that means...I should have another chocolate after that last one. And another. And another, just for the fun of it! How clever and conniving of me. I felt like I should do a happy dance in the living room to celebrate how crafty I've become in the chocolate-eating department. This is better than the day I realized I could make blush by mixing water and red food coloring!

And that, my friends, is the story of how the Easter bunny / my mouth stole my Easter chocolate.

I hope you had as much fun as I did!

Saturday, April 23, 2011

Asparagus, Goat Cheese & Date Salad


It's asparagus season!

Have you read that sentence about a thousand times since the beginning of March? Yeah, me too. But hey, it is asparagus season.

I don't know about you, but I can't really resist a bunch of asparagus when I see it at the store. Next to it are the broccoli, the mushrooms...I've been hanging out with those guys since winter. It's time to find someone new. 

Asparagus is long and lanky, kind of like that nice guy in high school who always seemed kind of awkward. It can be green, white or purple, but it pretty much always stands out. "Hey," it seems to tell us, "don't you just want to bite my head off?" In a good way, obviously. I don't hold a grudge against asparagus.


I love eating asparagus blanched, on its own, or simply roasted. Sometimes, though, you feel like taking things one step further and making a meal out of asparagus, try to let it become friends with some other food items. Like goat cheese, for example, for the tang. Add a chopped Medjool date in there, a few cherry tomatoes, and you've got yourself a springtime party.

Cadbury Mini Eggs just might be in attendance for dessert, so get your daily vegetables in while you can...and make that lonely lanky asparagus happy!


Asparagus, Goat Cheese & Date Salad
serves two

one bunch asparagus
10 cherry tomatoes, quartered
2 Medjool dates, pitted and chopped
4 TB soft fresh goat cheese
4 TB rice vinegar
1 TB olive oil
1 TS honey
salt and pepper to taste

Blanch asparagus until just tender. Remove from water, shock in cold water, and cut each stalk in half. Place in a serving bowl. Add cherry tomatoes and dates.

In a small bowl, mix rice vinegar, olive oil, goat cheese, honey, and salt & pepper. Drizzle over salad and serve.

Sunday, April 17, 2011

Moist Vanilla Cake and Chocolate Icing

 
Vanilla cake.

Chocolate icing.

How was your day going before you read those four words? And how about now?

The evocative power of words isn't a secret to anyone. You say sun, I think "hanging out at a café terrasse". You say work, I think "not hanging out at a terrasse". (Sun always wins, somehow.)

When I hear the words vanilla cake and chocolate icing together, in the space of a few seconds, I think of a fork. Of a mouth. Of my mouth.

Oh, and I also think of pink balloons, confetti, and trampolines. How about you?
 

Vanilla cake is like finding out you won something in a random drawing. It's sheer happiness, and makes you feel all warm and fuzzy inside. A lot of desserts actually make me feel like that, but vanilla cake is like adding a comforter and a soft pillow to all the greatness. Even better

The chocolate icing on top brings this moist vanilla cake up a notch, into the realm of "I could actually eat this forever and ever." Who cares about a stomach ache? Psh. I can deal with it for the sake of wrapping myself in bliss and an imaginary comforter.
 

Let me know if you need help eating cake one of these days.
 

Moist Vanilla Cake
adapted from Martha Stewart by way of Eleni
serves 6 as a small cake

1/2 c. butter, softened
1/2 c. + 2 TB all-purpose flour
1/2 c. granulated sugar
1 TS vanilla extract
1 large egg
1/2 TS baking powder
pinch salt
1/4 c. milk

Preheat oven to 325°F / 160°C.

Grease and flour a 4-inch cake pan or a pan of corresponding size.

Cream butter and sugar until light and fluffy. Add egg and vanilla extract and beat until incorporated.

In a medium bowl, mix flour, baking powder and salt. Add to butter mixture, alternating with milk. 

Pour into pan and bake until top is golden and a knife inserted in the center comes out clean, approximately 30 to 40 minutes. Cool in pan.
 

Chocolate Icing
courtesy of Eleni

3/4 c. butter, softened
1/2 c. confectioner's sugar
1/2 TS vanilla
2 1/2 TB semisweet chocolate chips, melted

Beat butter, vanilla, and chocolate together.

Add sugar until you achieve desired consistency. Spread on cake or eat with a spoon!

Wednesday, April 13, 2011

Getting Our Hands Dirty in Mexico

Third and last act of our family trip to Mexico.


After all the food we glimpsed at, lingered over, and ate, something was missing. We had to get into the kitchen and start cooking up some real Mexican food. 

Luckily, Maman had that all planned out for us and we embarked on a three hour-long journey through traditional Pueblan cuisine at the Meson Sacristia in the historic district with Chef Alonso Hernandez.

The agenda was tempting in itself. Imagine being given keys to the base of most Mexican cooking, and then seeing an example of what you could do with it. And, imagine being able to eat all of it with fresh hibiscus water as a refreshment. It's not heaven, my friends. It's Mexico.


The festivities started out with the traditional red and green sauces, a huge building block of Mexican food. With the help of a comal, a simple metal plate placed on a flame to cook ingredients, we turned tomatoes, tomatillos and chiles into two delicious sauces (with the help of a few other ingredients). Roasting on a comal gives everything a nice burn, helping the flavors develop and bloom in the blender.

The sauces were only a start. After setting them aside, we learned how the red sauce serves as a base for Mole Poblano. Puebla is the hometown of mole, the traditional Mexican sauce made with chiles and chocolate. Some of you may raise an eyebrow: chocolate in a sauce? A sauce that you can have with meat? "Don't knock it till you try it", as they say. Mole is worth le detour.


Mole takes a little while to make, and may be difficult because you need three different types of chiles: mulato, ancho, and pasilla. Once you've got them, though, you fry them up and let all the flavors explose--you're on your way to making a delicious mole, and that's no small feat.


During the class, my sister, maman and I had our eyes on the large bowls of salsa verde and salsa roja. We could imagine dipping huge tortilla chips and scooping up cup-fuls of the sauce...and why not eat it with a spoon?

We didn't get around to that, though, and made chalupas instead. Pan-fried corn tortillas get smothered in sauce, meat, and chopped white onion: a pretty nice alternative to the chips and salsa situation. 


If you're ever in Puebla, definitely consider taking this class if you can. Alonso Hernandez is eager to show his love for Mexican ingredients and Mexican cuisine, and we had a lot of fun trying out various recipes and cooking techniques. Not to mention that we left with a belly full of delicious food, and that's unbeatable. I wasn't even craving horchata afterward. And that's saying a lot.


Salsa Verde
makes one medium bowl

6 tomatillos
1/2 onion, cut into large slices
10 serrano chiles
1 clove garlic
1 bunch cilantro
1 cup water
salt to taste

Roast every ingredient except cilantro on a comal until tomatillos and onions start to blacken. 
Put all ingredients together in a blender, process until smooth, and add salt to taste. 


Salsa Roja
makes one medium bowl

6 red tomatoes
1/2 onion
4 dried chipotles
1 clove garlic
1 cup water
salt to taste

Roast all ingredients on a comal until they start to blacken. Process with water in a blender until smooth. Add salt to taste.